Saturday, December 30, 2006

Simple Sweater

i made this sweater all in single crochet, its very soft but a bit breezy, so you might want to wear something under it if its cold, or use 2 strands of yarn at once for thickness. this is just a prototype, which of course i then made a gift of :) yay me. i used some 3.5 oz balls of yarn- 4 of the main color (with a lot of the 4th ball left over) and 1 of the contrasting color (also with a lot of the ball left over. and i used a plastic size N hook. this fits a women's size small/medium, but you can change the size easily by chaining more stitches on the beginning foundation and adding more rows to the body for length.


2 colors: MC and CC


Instructions: with MC, ch 121


Row 1) sc in 2nd ch from hook and in each across.


Row 2) ch1, turn. sc in each sc across. (make sure u always have 120 sc across)


Rows 3-17) Repeat Row 2.


Row 18) change to CC and Repeat Row 2.


Row 19) (to make neck) ch1, turn. sc in each of 1st 50 sc. ch 20, skip next 20 sts. sc in each of last 50 sc.


Row 20) ch1, turn. sc in each sc and ch across. fasten off CC.


Rows 21-36) change to MC and Repeat Row 2.


At the end of Row 36, turn butdo not ch1. fold piece in half lengthwise so that the last Row worked and the Foundation chain meet.


Making sure that each stitch matches up, sl st (thru both thicknesses) in each of next 40 sts, to join sides and make sleeve. Fasten off, then with same side facing and counting left to right, skip 39 sts and join yarn to 40th st. sl st in each of last 39 sts. Fasten off and weave in ends.


You will now be working in Rounds.


Round 1) without turning work, join yarn with sl st to the farthest st to the right (the same st as last joining sl st of first sleeve). sc in each st around, including where 1st and last stitches of joining were made for sleeves. (80 sc around)


Round 2) ch1, turn. sc in same st as joining and in each around. join with sl st to top of first sc. (80 sc)


Rounds 3-4) Repeat Round 2.


Rounds 5-6) change to CC and Repeat Round 2.


Rounds 7-12) change to MC and Repeat Round 2.


Rounds 13-14) change to CC and Repeat Round 2.


Rounds 15-34) change to MC and Repeat Round 2.


Round 35) (dec shaping round so the body doesnt look all ripply) ch1, turn. sc in same st as joining and in each of next 6. dec over next 2 sts. (sc in each of next 7sc, dec over next 2 sts) around. join with sl st to top of 1st sc. (72 sts)


Round 36) ch1, turn. sc in each st around. join with sl st to top of 1st sc.


Neck:
Work 2 Rounds of sc around neck opening, making sure to sc dec over the 3 sts in both corners of 1st Round. Fasten off and weave in ends.


this is my original pattern. please do not sell this pattern, but you can print a copy for your personal use. if you feel the need to share with friends, please link back to my blog. you may sell the finished product if you wish, but dont forget to give credit where it's due!


Mari

Thursday, December 21, 2006

SUPERHAT!!!


I made this hat after looking online for an earflap hat... and found them all lacking. so i decided to take matters into my own hands! this pattern takes about 1.5oz to 2 oz of WW yarn, and that solid plastic hook in the picture there. It's bigger than the K but smaller than the other giant ones... i've been informed that it's an N hook! hooray!
Instructions: ch4, join with sl st to form ring.
1) ch1, 8sc in ring. join with sl st to top of 1st sc. (8sc)
2) ch1, 2sc in each sc around. join with sl st to top of 1st sc. (16sc)
3) ch1, sc in same st as joining, 2sc in next. (sc in next sc, 2sc in next) around. join with sl st to top of 1st sc. (24sc)
4) ch1, sc in same st as joining and in next, 2 sc in next. (sc in each of next 2 sc, 2sc in next) around. join with sl st to top of 1st sc. (32sc)
5) ch1, sc in same st as joining and in next 2, 2sc in next. (sc in each of next 3 sc, 2sc in next) around. join with sl st to top of 1st sc. (40sc)
6) ch1, sc in same st as joining and in each around. join with sl st to top of 1st sc. (40sc)
7-19) Repeat Round 6. (40 sc)
20) ch1, sc in same st as joining and in each of next 7. (8sc)
21-24) ch1, turn. sc in each of 8 sc of previous row. (8sc)
25) ch1, turn. sctog 1st 2 sts, sc in each of next 4 sc, sctog last 2 sts. (6 sts)
26) ch1, turn. sctog 1st 2 sts, sc in each of next 2 sc, sctog last 2 sts. (4 sts)
27) ch1, turn. sc in each of 1st 2 sts, ch26, then sl st in each ch (to make tie). sc in each of last 2 sts. Fasten off, weave in ends.
Now with right side facing and hat upside down, counting left to right away from first flap... join yarn with sl st to 20th st from flap.
1-8) Repeat Rows 20-27.
this is my original pattern, please do not sell this pattern. if you feel the need to share with friends, please link back to this blog. this pattern is for your personal use. you may sell the finished product if you wish, but remember to give credit where it's due!
Mari

Monday, December 18, 2006

Septopus (brown hat with brim using FPDC skillz!)

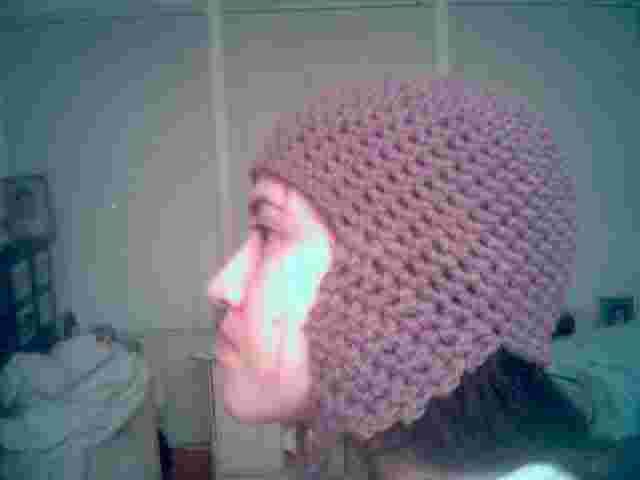
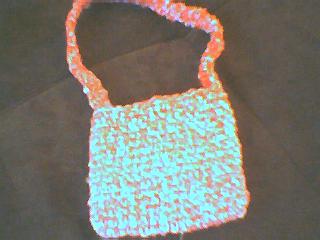
i made this up for my aunt's christmas present, yeah it's in poopoo brown lol. its really easy and uses a lot of repetitive "plus one" rounds... i just wish the picture was better!
i used an aluminum hook size H (US), and approximately 3-4 oz. of poopoo brown (it came from an 8oz skein of LeeWards "soft n' carefree" which i think is way super discontinued)

*Note- do NOT count ch1 at beginning of rounds as 1st sc.

Instructions:

ch 2.

Round 1: (sc in 2nd ch from hook) 7 times. join with sl st to top of 1st sc. (7sc)

Round 2: ch1, sc in same st as joining. (fpdc, sc into top of same st as fpdc) in next, around. ending with fpdc in last st. (7 fpdc, 7 sc)

Round 3: ch1, 2sc in same st as joining. fpdc in fpdc below. (from now on leave the stitch behind the fpdc's alone, unworked.) *2sc in next st, fpdc in fpdc* Repeat from *to* around. join with sl st to top of 1st sc. (7 fpdc, 14 sc)

Round 4: ch1, sc in same st as joining. *2sc in next sc, fpdc in fpdc, sc in next sc* Repeat from *to* around, ending with fpdc in last fpdc. join with sl st to top of 1st sc (7fpdc, 21 sc)

Round 5: ch1, sc in same st as joining and in next sc. 2 sc in next. fpdc in fpdc. *sc in each of next 2 sc, 2sc in next. fpdc in fpdc* Repeat from *to* around. join with sl st to top of 1st sc. (7 fpdc, 28 sc)

Round 6: ch1, sc in same st as joining and in next 2 sc. 2sc in next, fpdc in fpdc. *sc in each of next 3 sc, 2 sc in next. fpdc in fpdc* Repeat from *to* around. join with sl st to top of 1st sc. (7 fpdc, 35 sc)

Round 7: ch1, sc in same st as joining and in each of next 3 sc. 2sc in next, fpdc in fpdc. *sc in each of next 4 sc, 2 sc in next. fpdc in fpdc* Repeat from *to* around. join with sl st to top of 1st sc. (7 fpdc, 42 sc)

Round 8: ch1, sc in same st as joining and in each of next 4 sc. 2 sc in next, fpdc in fpdc. *sc in each of next 5 sc, 2sc in next. fpdc in fpdc* Repeat from *to* around. join with sl st to top of 1st sc. (7 fpdc, 49 sc)

Round 9: ch1, sc in same st as joining and in each of next 5 sc. 2 sc in next, fpdc in fpdc. *sc in each of next 6 sc, 2 sc in next. fpdc in fpdc* Repeat from *to* around. join with sl st to top of 1st sc. (7 fpdc, 56 sc)

Round 10: ch1, sc in same st as joining and in each of next 6 sc. 2 sc in next, fpdc in fpdc. *sc in each of next 7 sc, 2 sc in next. fpdc in fpdc* Repeat from *to* around. join with sl st to top of 1st sc. (7 fpdc, 63 sc)

Round 11: ch1, sc in same st as joining and in each of next 7 sc. 2 sc in next, fpdc in fpdc. *sc in each of next 8 sc, 2 sc in next. fpdc in fpdc* Repeat from *to* around. join with sl st to top of 1st sc. (7 fpdc, 70 sc)

Round 12: ch1, sc in same st as joining and in each of next 8 sc. 2sc in next, fpdc in fpdc. *sc in each of next 9 sc, 2 sc in next. fpdc in fpdc* Repeat from *to* arounf. join with sl st to top of 1st sc. (7 fpdc, 77 sc)

Round 13: ch1, sc in same st as joining. sc in each sc, fpdc in each fpdc around. join with sl st to top of 1st sc. (7 fpdc, 77 sc)

Rounds 14-28: Repeat Round 13

Brim:
Row 1: ch3, dc in each of next 28 sts. (29 dc)

Row 2: ch3, turn. alternate fpdc's and dc's across, making dc dec over last 2 sts. (27 sts)

Row 3: ch1, make sc dec over 1st 2 sts. sc dec over next 2 sts, sc in each of next 9 sts. make sc dec over next 3 sts, sc in each of next 9 sts. sc dec over last 2 sts. Fasten off, weave in ends. (22 sts)

this is my original pattern, please do not post on any other website. if you feel the need to share with friends, please link back to my blog. do not sell this pattern, it is free for your personal use. you may sell the finished product if you wish... dont forget to give credit where it's due!


Mari <3

Sunday, December 10, 2006

Just a lil bit of Showing Off


here are the squares i'm making for Stitchfest 2 (see previous post)
they're 6"x6" and super pretty! lol
here's the "pattern" i used, it's basic crochet and i can't really call it a pattern without the quotes, cuz anyone could come up with it.

3 colors: A, B, C
Using an aluminum hook size F and color A: ch26

Row 1: sc in 2nd ch from hook and each across. (25 sc)

Rows 2-8: ch1, sc in each sc across. (25 sc)

Rows 9-16: With color B: Repeat Rows 2-8. (25 sc)

Rows 10-25: With color C: Repeat Rows 2-8. (25 sc)

You will have 25 Rows, 25 stitches each row. Fasten off, weave in ends.

Thursday, December 7, 2006

Stitchfest 2 for the Chicago Rape Crisis Hotline

yesterday i read a post on one of my myspace group forums (yeah im a blog hopper :P) about a "stitchfest" being held in chicago on the 1st. the goal of this meeting is to "come together in peace and joy while creating a symbol of love to support those who are fighting to end sexual violence". and i thought it was neat, to be able to do something to show appreciation for those ladies that work for the hotline.
but sadly my schedule for the first is already filled :( so i messaged the girl that put up the post and she said i could send in swatches, varying between 4"x4" and 6"x6" <3 and so im making 6x6 squares yay!
here is a link to the stitchfest 2 myspace page for more info, if anyone is interested
http://www.myspace.com/stitchfest2


Mari <3

Wednesday, December 6, 2006

Alien Invasion Ipod Jacket (for ipod shuffle)

Look at this little cutey! i came up with this in an hour, while watching one of those primetime hour long shows on NBC. I used fingering weight yarn (the same as for the 7 Point Deliciousness Doily) and an aluminum size F hook (US).

Instructions: ch 6.

Round 1: sc in 2nd st from chain and in each across, putting 3 sc in last st, then turn and work in free loops on underside. sc across, putting 2 sc in last free loop (which is the same space as the first sc. join with sl st to top of 1st sc. (12 sc around)

Round 2: ch1, sc in same st as joining and in each around. join with sl st to top of 1st sc. (12 sc around)

Rounds 3-12: Repeat Round 2. (12 sc around)

Row 13:ch1, sc in same st and in each of next 8 sts. ch1, turn. (8sc across)

Rows 14-15: Repeat Row 13. (dont forget to ch1, turn... at end of Row 13!) (8sc across)

Round 16: sc in same st as ch1 and in each across. ch 4, join with sl st to top of 1st sc in Round. (8sc, 4ch's, around)

Round 17: ch1, do not turn. sc in same st as joining and in each across. join with sl st to top of 1st sc. (12 sc around)

Round 18- 19: Repeat Round 17. (12 sc around)

Antennae: sl st into top center over the little box.* ch 7, 3 sc in 2nd ch from hook. sl st down each ch*. sl st into next sc of Round 19. Repeat from *to* once more. join with sl st to same space as last ch7. fasten off, weave in ends.

Arm: slip cover on ipod to find center of sides. join yarn (i joined mine in the 12th round, under the 2nd st of row 13. ch 11, sc in 2nd ch from hook and in each of next 2, ch 3(for "thumb" or whatever) sl st back. sc in each of remaining chs of arm. sl st to side of jacket and fasten off. weave in end.

Repeat on other side for 2nd arm.

this is my original pattern. you may use this pattern for your own personal use. please do not sell this pattern, or post it anywhere else online. if you feel the need to share with friends, please link back here. you may sell the finished product if you wish.

Tuesday, December 5, 2006

Beautiful Cable Purse edited (scroll down for translation)

i'm trying to write out the pattern that i came up with... its REALLY easy and i can reproduce this product (its a purse) very quickly. there isnt even any fastening off/joining until the very end. maybe someone can help me translate the directions into crochet speak? i would really appreciate that

here's how it goes: **Note: i dont know how to write that part about skipping the stitch behind the fpdc.. please fogive me that i didnt write that down for every row, just take it for granted that i did **

it starts with 21 sc.there are three rows of sc in the beginning.
then sc in 1st sc, twin cables with fpdc, sc in next 5. fpdc, sc, fpdc, until there are 3 cables with 2 spaces of 1sc. then 5 sc after that. and end like it started, with twin cables (fpdc in each of next 2 sc) and an sc in the last stitchalternate fpdc rows and sc rows

you make the cables that way til there are 3 rows with cables, which is 7 rows, but the lines (who gets me here? the lines that come out so u can count rows of stitches by 2) the lines will be 3.

on the 8th row, its the "twist" row. work the same way with the first two fpdc's, then instead of making an sc in each of next 5, sc in next 7. then make an fpdc around the post of the first fpdc in prev. row. you'll have to reach back, and it will look like a backslash. sc in next, fpdc in the next fpdc of prev. row. sc in next 5, then fpdc in each of next 2 and end row with sc in last sc.

make 3 cable rows (remember alternate sc and fpdc rows!) "straight", then make one more "twist" row.

then make 3 more "straight" cable rows, and end the side with a row of sc...

the other side: make an sc row in back loops only, this way the purse can fold easy and you wont have to count so hard when stitching up the sides later. plus its a fringe facilitator work this side the same as the other one, ending with a row of sc.

ch1, turn.sl st back, into 2nd to last sc of last row.
ch1, sc over the stitches u just sl st'ed into, and (you have to fold the piece now thanks)
sc in the last 2 sts.... in the free loops of the first row u ever worked.

and the strap is worked this way:alternate sc and fpdc rows... the fpdc rows have (sc, fpdc in each of next 2 sts, sc) and the strap can be however long u want, as long as u end with an sc row, then sl st or whipstich (whichever) the strap to the other side, the same way, with the 2 firsts of each side of the work. fasten off and stuff

then whip stitch the sides together, and make fringey things and attach them to those stitches that u worked in back loops only.and voila! someone help PLEASE!! its a beautiful purse! :'(

**EDIT: THANKS SO MUCH TO THE CHICKS AT Crochetville FOR THEIR HELP WITH THE TRANSLATION OF THIS PATTERN! ESPECIALLY flyinghooks for getting the pattern dead on! way cool!! you can find her translation here
THANKS AGAIN!! :)

this is my original pattern, please do not post this on any other website, if u want to share this just link back here. do not sell this pattern, but if you want to sell the finished product, please feel free to do so..

Mari <3

Saturday, December 2, 2006

Cables, Cables, Cables!

Ok im having slight issues uploading pictures... Hopefully this is a problem that "goes away" cuz i have no idea whats going on. probably maintenance? or maybe its my retarded computer... Anyways the first picture is of my cable project, i'm turning it into a purse. the picture is taken on its side, and u can see the space thats in back loops only, thats so that i dont have to make 2 separate pieces, i can just fold it in half :) like in this picture? lats see if this works how i want...


crap... ok.

here are links to the pictures thru photobucket in the meantime...
http://i30.photobucket.com/albums/c350/mariG123/crochet/PictureCrochet018.jpg
http://i30.photobucket.com/albums/c350/mariG123/crochet/PictureCrochet019.jpg
http://i30.photobucket.com/albums/c350/mariG123/crochet/PictureCrochet020.jpg

i'll be back when i can figure this out! blargh!!

Mari <3

Friday, December 1, 2006

Orangeosity! (orange+monstrosity=the best hat ever!)

Yeah umm... so i have been yeening a bit, having been captivated by aran cable sweaters :) currently experimenting with "twisting" cables. It'll probably turn into a scarf, but that's just my pre-project manifestation forecast. Anyways to rest up my hands i decided to post this other pattern, made from the same Homespun Calypso yarn (same skein even!) as the little orange bag in my 2nd post. I actually made this hat first and used most of what was left over for the bag http://i30.photobucket.com/albums/c350/mariG123/crochet/homespunorangeycloche.jpg

Instructions: ch2

Round 1) 6 sc in 2nd ch from hook. join with sl st to top of 1st sc. (6 sc)

Round 2) ch1, 2sc in each st around. join with sl st to top of 1st sc. (12 sc)

Round 3) ch1, sc in same sp. *2sc in next st, sc in next, around. join with sl st to top of 1st sc. (18 sc)

Round 4) ch1, sc in same sp and next. *2sc in next st, sc in each of next 2 sts, around. join with sl st to top of 1st sc. (24 sc)

Round 5) ch 1, sc in same sp and each of next 2. *2sc in next, sc in each of next 3 sts, around. join with sl st to top of 1st sc. (30 sc)

Round 6) ch1, sc in same sp and each of next 3. *2sc in next, sc in each of next 4 sts, around. join with sl st to top of 1st sc. (36 sc)

Round 7) ch1, sc in same sp and each of next 4. *2sc in next, sc in each of next 5 sts, around. join with sl st to top of 1st sc. (42 sc)

Round 8) ch1, sc in same sp and each st around. join with sl st to top of 1st sc. (42 sc)

Rounds 9-10) Repeat Round 8. (42 sc)

Round 11) ch1, sc in same sp and each of next 5. *2sc in next, sc in each of next 6 sts, around. join with sl st to top of 1st sc. (48 sc)

My First Doily- 7 Point Deliciousness <3

When i first started crocheting this, it was supposed to be a glass/soda can cozy. As you can see from the picture, the first 6 rounds are in plain jane single crochet, and that part is in fact the exact size of the bottom of a can of coke :P. But somehow instead of closing around the circle, my stitches ended up fanning out from it. And taking my cue (believer in manifest destiny... to a point) i let it manifest itself. Tah-Dah! The Ruler of the Doilies! lol ok maybe not but it is very cute and very easy (and strangely oh so mathematical and precise!)
I made this with Cervinia Amalfi fingering weight yarn (1 and 3/4 oz skein, see it there in the pic not even half gone?) and an aluminum size F hook (US)

Instructions:
ch2
1) (sc in 2nd ch from hook) 6 times. join with sl st to top of 1st sc. ch1, do not turn. (6 sts)
2) 2 sc in each st around. join with sl st to top of first sc. ch1, do not turn. (12 sts)
3) sc in same st as joining. 2sc in next st, *sc in next, 2sc in next st* repeat from *to* around. join with sl st to top of 1st sc. ch1, do not turn. (18 sts)
4) sc in same st as joining and in next st. 2 sc in next, *sc in each of next 2 sc, 2sc in next* repeat from *to* around. join with sl st to top of 1st sc. ch1, do not turn. (24 sts)
5) sc in same st as joining and in each of next 2 sts. 2 sc in next, *sc in each of next 3 sts, 2 sc in next * repeat from *to* around. join with sl st to top of 1st sc. ch1, do not turn. (30 sts)
6) sc in same st as joining and in each of next 3 sts. 2 sc in next, *sc in each of next 4 sts, 2 sc in next* repeat from *to* around. join with sl st to top of 1st sc. (36 sts)
7) ch3 to count as 1st dc, do not turn. (4dc, ch2, 5dc) in same st as joining. sk 4 sts, *(5dc, ch2, 5dc) in 5th st, sk 4 sts* repeat from *to* around, join with sl st to top of beginning ch3, do not turn.
8) ch3 to count as first dc, 2dc in same st as joining. *ch2, sc in next ch2 sp, ch2. sk 5 dc, 5dc in next. repeat from * 6 times more, ending with: ch2, sc in next ch2 sp, ch2, 2dc in same sp as 1st ch3 at beginning of round. join with sl st to top of beginning ch3. do not turn.
9) ch3 to count as 1st dc, (4dc, ch2, 5dc) in same st as joining. (dc, ch2, dc) in next sc. *(5dc, ch2, 5dc) in center dc of next 5dc group, (dc, ch2, dc) in next sc. repeat from *to* around. join with sl st to top of beginning ch3.
10) sl st into center of 1st 5dc group. ch2 to count as 1st hdc, hdc in same st. *ch3, sc in next ch2 sp, ch3. 2hdc in center of next 5dc group, 5dc in next ch1 sp, 2hdc in center of next 5dc group. repeat from * around, ending with: 5dc in last ch1 sp. join with sl st to top of beginning ch2.
11) sl st into 1st closest ch3 sp. ch1, sc in same sp, ch3, *sc in next ch3 sp. 1 dc in each of next 2 dc, (3dc, ch2, 3dc) in next, 1 dc in each of next 2 dc. sc in next ch3 sp, ch3. repeat from * around, ending with: 1dc in each of next 2 dc, (3dc, ch2, 3dc) in next, 1 dc in each of next 2 dc. join with sl st to top of 1st sc. ch1, do not turn.
12) sc in same st as joining and in each st and ch around, putting (sc, picot, sc) in each of the 7 points.
to work picot: (ch3, sl st in 1st ch of ch3).
Join with sl st to top of 1st sc. Fasten off, weave in ends.

sorry guys, here come the neccessary rules...

THIS IS MY ORIGINAL PATTERN. YOU MAY USE THIS PATTERN FOR YOUR OWN PERSONAL USE. DO NOT POST ON ANY OTHER WEBSITES, PLEASE LINK BACK HERE IF YOU WANT TO SHARE WITH OTHERS ONLINE. YOU MAY NOT SELL THIS PATTERN, BUT FEEL FREE TO SELL THE FINISHED PRODUCT IF YOU WISH.

Mari <3

Thursday, November 30, 2006

Hot Pink and Oatmeal Purse and Cell Phone Case


I made this while trying to think up a cute lollipop cover to give out for Christmas... It turned into a cell phone case, which naturally made me think "Must make MATCHING PURSE!!" And so another monster was born. I used Red Heart Super Saver in Bright Pink, and Wintuk? in Oatmeal, which i think is like super discontinued?? not sure... But anyways I used an aluminum hook size G (US). This project is really cool to me because I could make 2 sets with reversed colors... but I had less than half a skein of either of these colors :P

colors are MC (main color) and CC (contrasting color)

Purse:
With MC, ch 29

1) sc in 2nd ch from hook and in each st across, ch1, turn. (28 sc)

2) sc in each sc across, ch1, turn. (28 sc)

3) sc in each sc across, putting 3 sc in last st. Turn piece on side and put 1 sc in between Rows 1 and 2. Turn piece around and work free loops on opposite side. 3 sc in first st,1 sc across, with 1 sc in between Rows 1 and 2 on other side, and 2 sc in last st. Join with sl st to top of 1st sc.

4) work in bl only. ch1, do not turn. sc in same st as joining and in each around. Join with sl st to top of 1st sc.

5) Repeat Round 4.

6) ch2, hdc in same st as joining and in each around. Join with sl st to top of first hdc (not ch2).

7)Repeat Round 6.

8-9) Repeat Round 4.

10-11) Repeat Round 6.

12-13) Repeat Round 4.

14-15) Repeat Round 6.

16) change to CC, making sure to join yarn at same place as joining on previous Round. Repeat Round 4.

17) Repeat Round 4.

18-19) Repeat Round 6.

20-21) Repeat Round 4.

22) change to MC, joining yarn 4 stitches before place of joining on previous Round. Reapeat Round 6.

Strap:
23) ch2, hdc in same st as joining and in each of next 17 sts. ch 30 (this will become the strap) skip next 15 sts. hdc in next st and in each of next 17 sts. join with sl st to top of first hdc.

24) sl st in bl only of next 4 sts, ch1, sc in same space as last sl st. sc in next 12 sts. make sc decrease over next 2 sts. sc in each of next 29 sts, make sc decrease over next 2 sts. sc in each of next 15 sts, make sc decrease over next 2 sts. sc in each of next 28 sts, make sc decrease over next 2 sts. sc over sl sts made in beginning of round, join with sl st to top of 1st sc.

25) ch1, working in bl only, sc in same st as joining and in each of next 12 sc. make sc decrease over next 2 sts. sc in each of next 28 sts, make sc decrease over next 2 sts. sc in each of next 14 sts, make sc decrease over next 2 sts. sc in each of next 27 sts, make sc decrease over next 2 sts. sc in last 2 sts, join with sl st to top of 1st sc.

26) ch2, hdc in same st as joining and in each sc around, making hdc decreases over 2 sts at beginnings and ends of straps. joing with sl st to top of 1st hdc. Fasten off, weave in ends.

Cell Phone Case:
With MC, ch 9

1) sc in 2nd ch from hook and in each st across(8sc). ch1, turn.

2) sc in same st as ch1 and in each across(8sc). ch1, turn.

3) 3 sc in same st as ch1. sc in each st across to last sc, 3 sc in last. Turn piece and work 1 sc in the side, in between Rows 1 and 2. Turn. You will now work on the underside of Row 1, in the free loops. 3 sc in 1st st, 1 sc across to last st. Turn and work 1 sc in the side, in between Rows 1 and 2. Join with sl st to top of 1st sc (not ch1). (26 sc around)

4) Working in bl only, ch1, do not turn. sc in same st as joining and in each around. Join with sl st to top of 1st sc (not ch1). (26 sc)

5) Repeat Round 4. ch2, do not turn.

6) hdc (thru both loops) in same st as joining and in each around. Join with sl st to top of 1st hdc (not ch2). (26 hdc)

7) Repeat Round 6.

8-9) Repeat Round 4.

10-11) Repeat Round 6.

12-13) Repeat Round 4.

Strap:
1) ch1, do not turn. sc (thru both loops) in same sp as joining and in next 4 sts.

2) ch1, turn, sc in each of the 5 sts of previous Row.

3-22) Repeat Row 2.

Making Buttonhole:

23) ch1, turn, sc in same st and next after it. ch2, sk 1 st, sc in each of next 2 sts. (6 sts)

24) ch1, turn. make sc decrease over same st as ch1 and next after it. 2 sc in ch2 sp and in each of next 2 sts. (5 sts)

25) ch1, turn. make sc decrease over same st as ch1 and next after it. sc in each of next 3 sts. (4 sts)

26) ch1, turn. make sc decrease over same st as ch1 and next after it. sc in each of next 2 sts. (3 sts)

27) ch1, turn. make sc decrease over same st as ch1 and in next after it. sc in next st. (2 sts)

28) ch1, turn. make sc decrease over the 2 sts in Row. secure this stitch with a sl st so it doesnt fall apart. cut yarn and weave in ends.

Now you can either sew a ready made button onto the side of the cell phone case, or make your own with crochet, like i did :D

To Make Button: ch2, 8 sc in 2nd ch from hook, join with sl st to top of 1st sc.

ch1, do not turn. 2 sc in each st around. join with sl st to top of 1st sc. Fasten off yarn, leaving a long tail, this is why:

weave the tail in and out between the stitches in the 2nd Round of button. then bring thru the whole in the center and pull really tight so the little circle becomes a ball. sew little ball button to the side of cell phone case.

Optional: make a little applique in CC (mine was a heart.. derr...) and sew it to the front.

sorry guys, here come the neccessary rules...
THIS IS MY ORIGINAL PATTERN. YOU MAY USE THIS PATTERN FOR YOUR OWN PERSONAL USE. DO NOT POST ON ANY OTHER WEBSITES, PLEASE LINK BACK HERE IF YOU WANT TO SHARE WITH OTHERS ONLINE. YOU MAY NOT SELL THIS PATTERN, BUT FEEL FREE TO SELL THE FINISHED PRODUCT IF YOU WISH.
Mari <3

Mesh Bag

This is my super easy mesh bag! It's shown here in my yellow and pink version (she was feeling more photogenic on picture day) but i wrote the pattern for just one color throughout. The pattern is so simple that you should be able to make any color changes you want with ease. I use this bag to tote around my yarn and unfinished projects (although not the hooks cuz they'll fall through the mesh!) And i used approximately one skein (3 oz?) of Red Heart Super Saver for this and an aluminum hook size K (US)

Base: ch15

1) dc in 3rd ch from hook and in each across. ch3, turn.

2) dc in each stitch across. ch3, turn.

3-14) Repeat Row 2. At end of Row 14, ch1, turn. You will now work in Rounds.

15) sc around the whole piece evenly, putting 3 sc's in corner spaces of rectangle base. join with sl st to top of 1st sc

16) ch4 to count as dc+ch1. *skip one st, dc in next, ch1*. Repeat from *to * around. Join with sl st to 3rd ch of 1st ch4.

17) sl st into closest ch1 sp, ch4 to count as dc+ch1. *skip one st, dc in next, ch1*. Repeat from *to* around. Join with sl st to 3rd ch of 1st ch4.

18-28) Repeat Round 17

Strap:
29) sl st into next 4 sts, ch1, turn. sc over the stitches u just sl st'ed into, and in next 4. so you have 8 sc per row of strap.

Work 40 Rows of 8 sc for Strap.

Turn bag inside out and attach loose end of strap to opposite side (i just sl st'ed it together). Make sure it's even, which should be approximately 16-17 meshes in between the start of each strap.

sorry guys, here come the neccessary rules...

THIS IS MY ORIGINAL PATTERN. YOU MAY USE THIS PATTERN FOR YOUR OWN PERSONAL USE. DO NOT POST ON ANY OTHER WEBSITES, PLEASE LINK BACK HERE IF YOU WANT TO SHARE WITH OTHERS ONLINE. YOU MAY NOT SELL THIS PATTERN, BUT FEEL FREE TO SELL THE FINISHED PRODUCT IF YOU WISH.

Mari <3

Little Homespun Bag

Here is a very simple and quick pattern for a cute little purse :) You can use it to hold your myOWn (money), i.d., and lipgloss. Or make it for your special little girl to play with!
I made mine with a small amount of Lion Brand Homespun yarn in Calypso (pretty orangey color) and an aluminum size J hook(US)

Instructions: ch16

1) sc in 2nd ch from hook and in each across; put 3 sc in last st, turn piece around and work free loops on opposite side- 1 sc across, putting 2 sc in last sc (free loop of 1st sc on other side). Join with sl st to 1st sc.

2) ch1, sc in same st as joining and in each around. Join with sl st to top of 1st sc. *Note- ch1 at beginning of round NEVER counts as 1st sc

3-15) Repeat Round 2.

At end of Round 15, do NOT fasten off.

Strap:
1) ch1, sc in same st as joining, and in next st. ch1, turn.

2) sc in same st as ch1, and in next st. ch1, turn.

3-50) Repeat Row 2. Fasten off at end of Row 50, leaving a long enough strand of yarn attached to sew the strap to the side of the bag.

sorry guys, here come the neccessary rules...

THIS IS MY ORIGINAL PATTERN. YOU MAY USE THIS PATTERN FOR YOUR OWN PERSONAL USE. DO NOT POST ON ANY OTHER WEBSITES, PLEASE LINK BACK HERE IF YOU WANT TO SHARE WITH OTHERS ONLINE. YOU MAY NOT SELL THIS PATTERN, BUT FEEL FREE TO SELL THE FINISHED PRODUCT IF YOU WISH.

Mari <3

yay!

hey! :) i just started this blog to post about my obsessions with yarn and crochet :D
and to offer the world my original patterns! i love crochet, and the way to my heart is with a skein of yarn <3